Before Starting a Simulation
Before starting the simulation process it’s important to make sure that your part is fully modeled in SOLIDWORKS and is fully defined to your liking and to ensure that the correct material and material properties are applied to our model so ensure that our analysis values are accurate.
Applying a Material
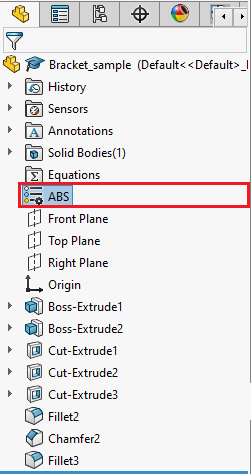
Adding a material can be done by right clicking and selecting the “Edit Material” option on thematerial prompt in the feature tree and choosing the desired material from the material library.
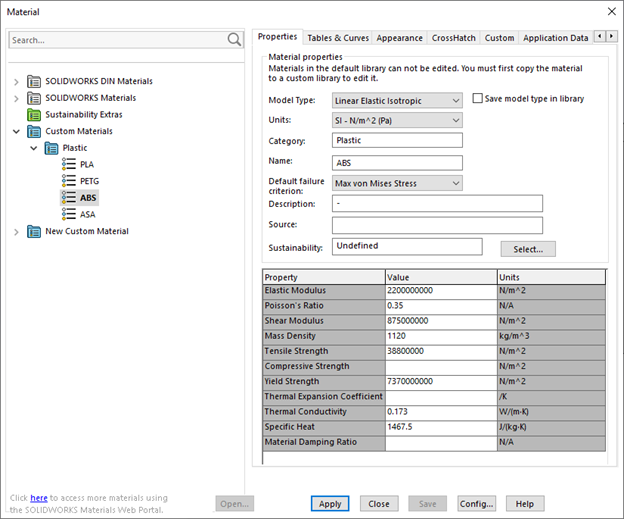
Once opened, the material window will now be opened. This window contains a wide variety of materials that have been pre-installed with SOLIDWORKS. Before a material is added, some research should be conducted to determine the optimal material parameters for your specific material. As for our property values, a table of material parameters for each of the commonly used filaments has been provided by the student hub which can be used to fill out the necessary values (to access the properties, click the link here to access the google sheets file.
These numbers have been sourced & compiled mainly using a website called Matweb, an online datasheet site where material data sheets can be searched. Using these values, the automatically generated values for our newly established ABS can be replaced with the material property values listed in the material property table (please ensure that the values are entered using the appropriate units and that values are converted correctly where needed).
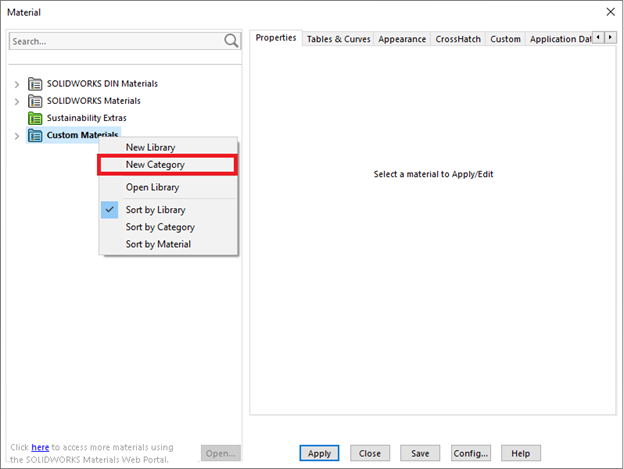
A category folder will need to be created within the desired material folder as well before a material is added. To do so, scroll down to the “Custom Materials” folder or any folder that you wish to add the material to, right click and select the “New Category” option. This will create a new folder to organize the added material(s) to. To add a new material to this category folder, right click the desired folder and select ‘New Material”.
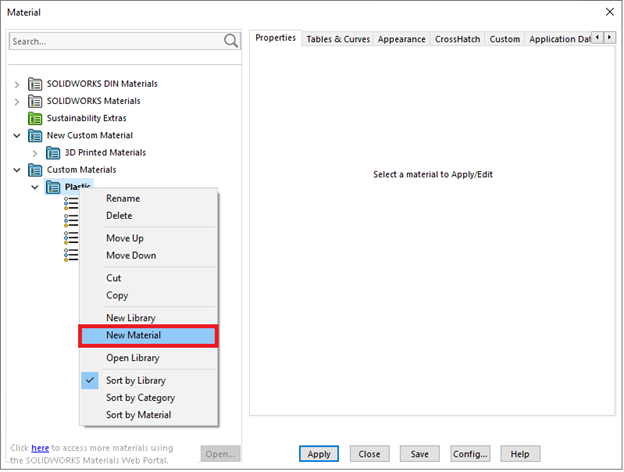
If you wish to create a new folder to add multiple new materials or to organize your added materials, a new material folder can also be created by right clicking anywhere in the folder pane and selecting “New Library”. This new folder will then be saved in the custom materials folder in the SOLIDWORKS computer file and can have new folders added to it by selecting “New Category” on the appropriate folder as well.
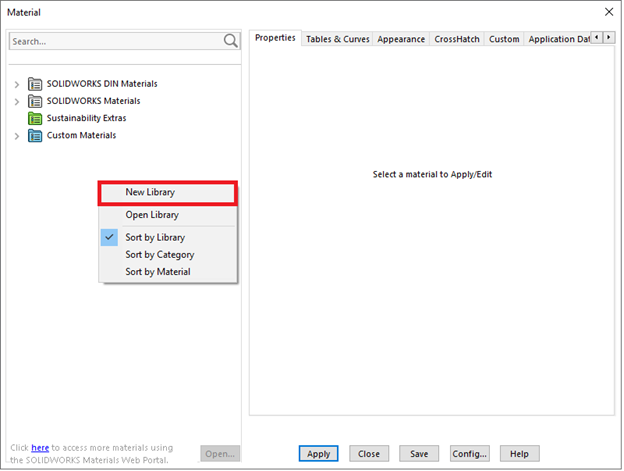
For this tutorial the bracket will be made of ABS, so the 3D ABS material will be created in a new Main folder named “New Custom Material” with a “3D Printed Material” category folder that the ABS material profile will go into.
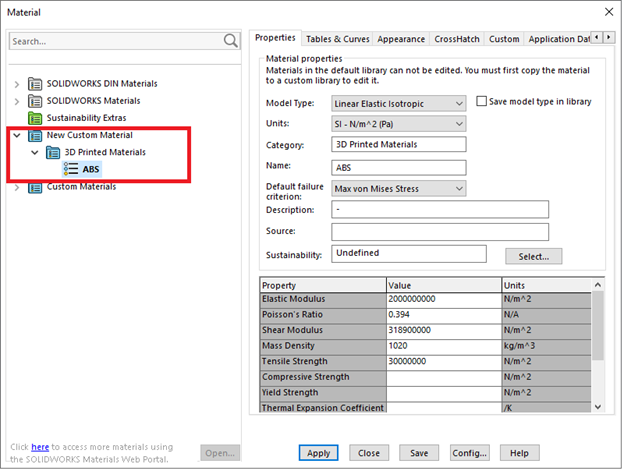
With the material added, the material property values can now be edited. Clicking on a material profile in the material list will open the material profile information to the right of the material as shown in the image above. The profile will have both a list of settings as well as a table which can be used to configure any given material. For our material, we will be leaving the material settings as is. Our model type will dictate the stress-strain relation of the material which for our analysis we was to keep linear, so we will keep the model type as “Linear Elastic Isotropic” As well, Von mises stresses will be the stress values used to compare with our materials ultimate tensile & flexural strength, so our failure. All other settings are optional and can remain blank.
