Stock Setup
Work Holding
The first step in stock preparation is deciding how to hold your work piece in the vise.
There are multiple ways that the vise can hold your stock piece however, depending on the cuts that will be made, one setup may be favoured over another. This step must be decided before you prepare your stock because different holdings will require different stock measurements. For example three common types are bottom hold, tabs, and fixturing.
Additionally, adding additional material to your stock should be done in CAM so that when you print your setup sheet, the stock measurements will be exactly what you need.
For the part used in this specific tutorial, we will be using a bottom hold. For this holding setup, the additional stock will need to be added to the bottom of the piece (in the z axis).
*TIP: When adding extra stock to the thickness (z-direction), add an amount so that the thickness corresponds to a thickness that is available in the stock room (ie. 1/4 or 1/2 inch).
NOTE: If this is the first time the CNC has been used for the day, it’s best to run a spindle warmup before you begin. For more information on how to prep the machine for the day, visit https://www.instructables.com/Starting-Up-the-HAAS-Mill/.
Preparing the Stock
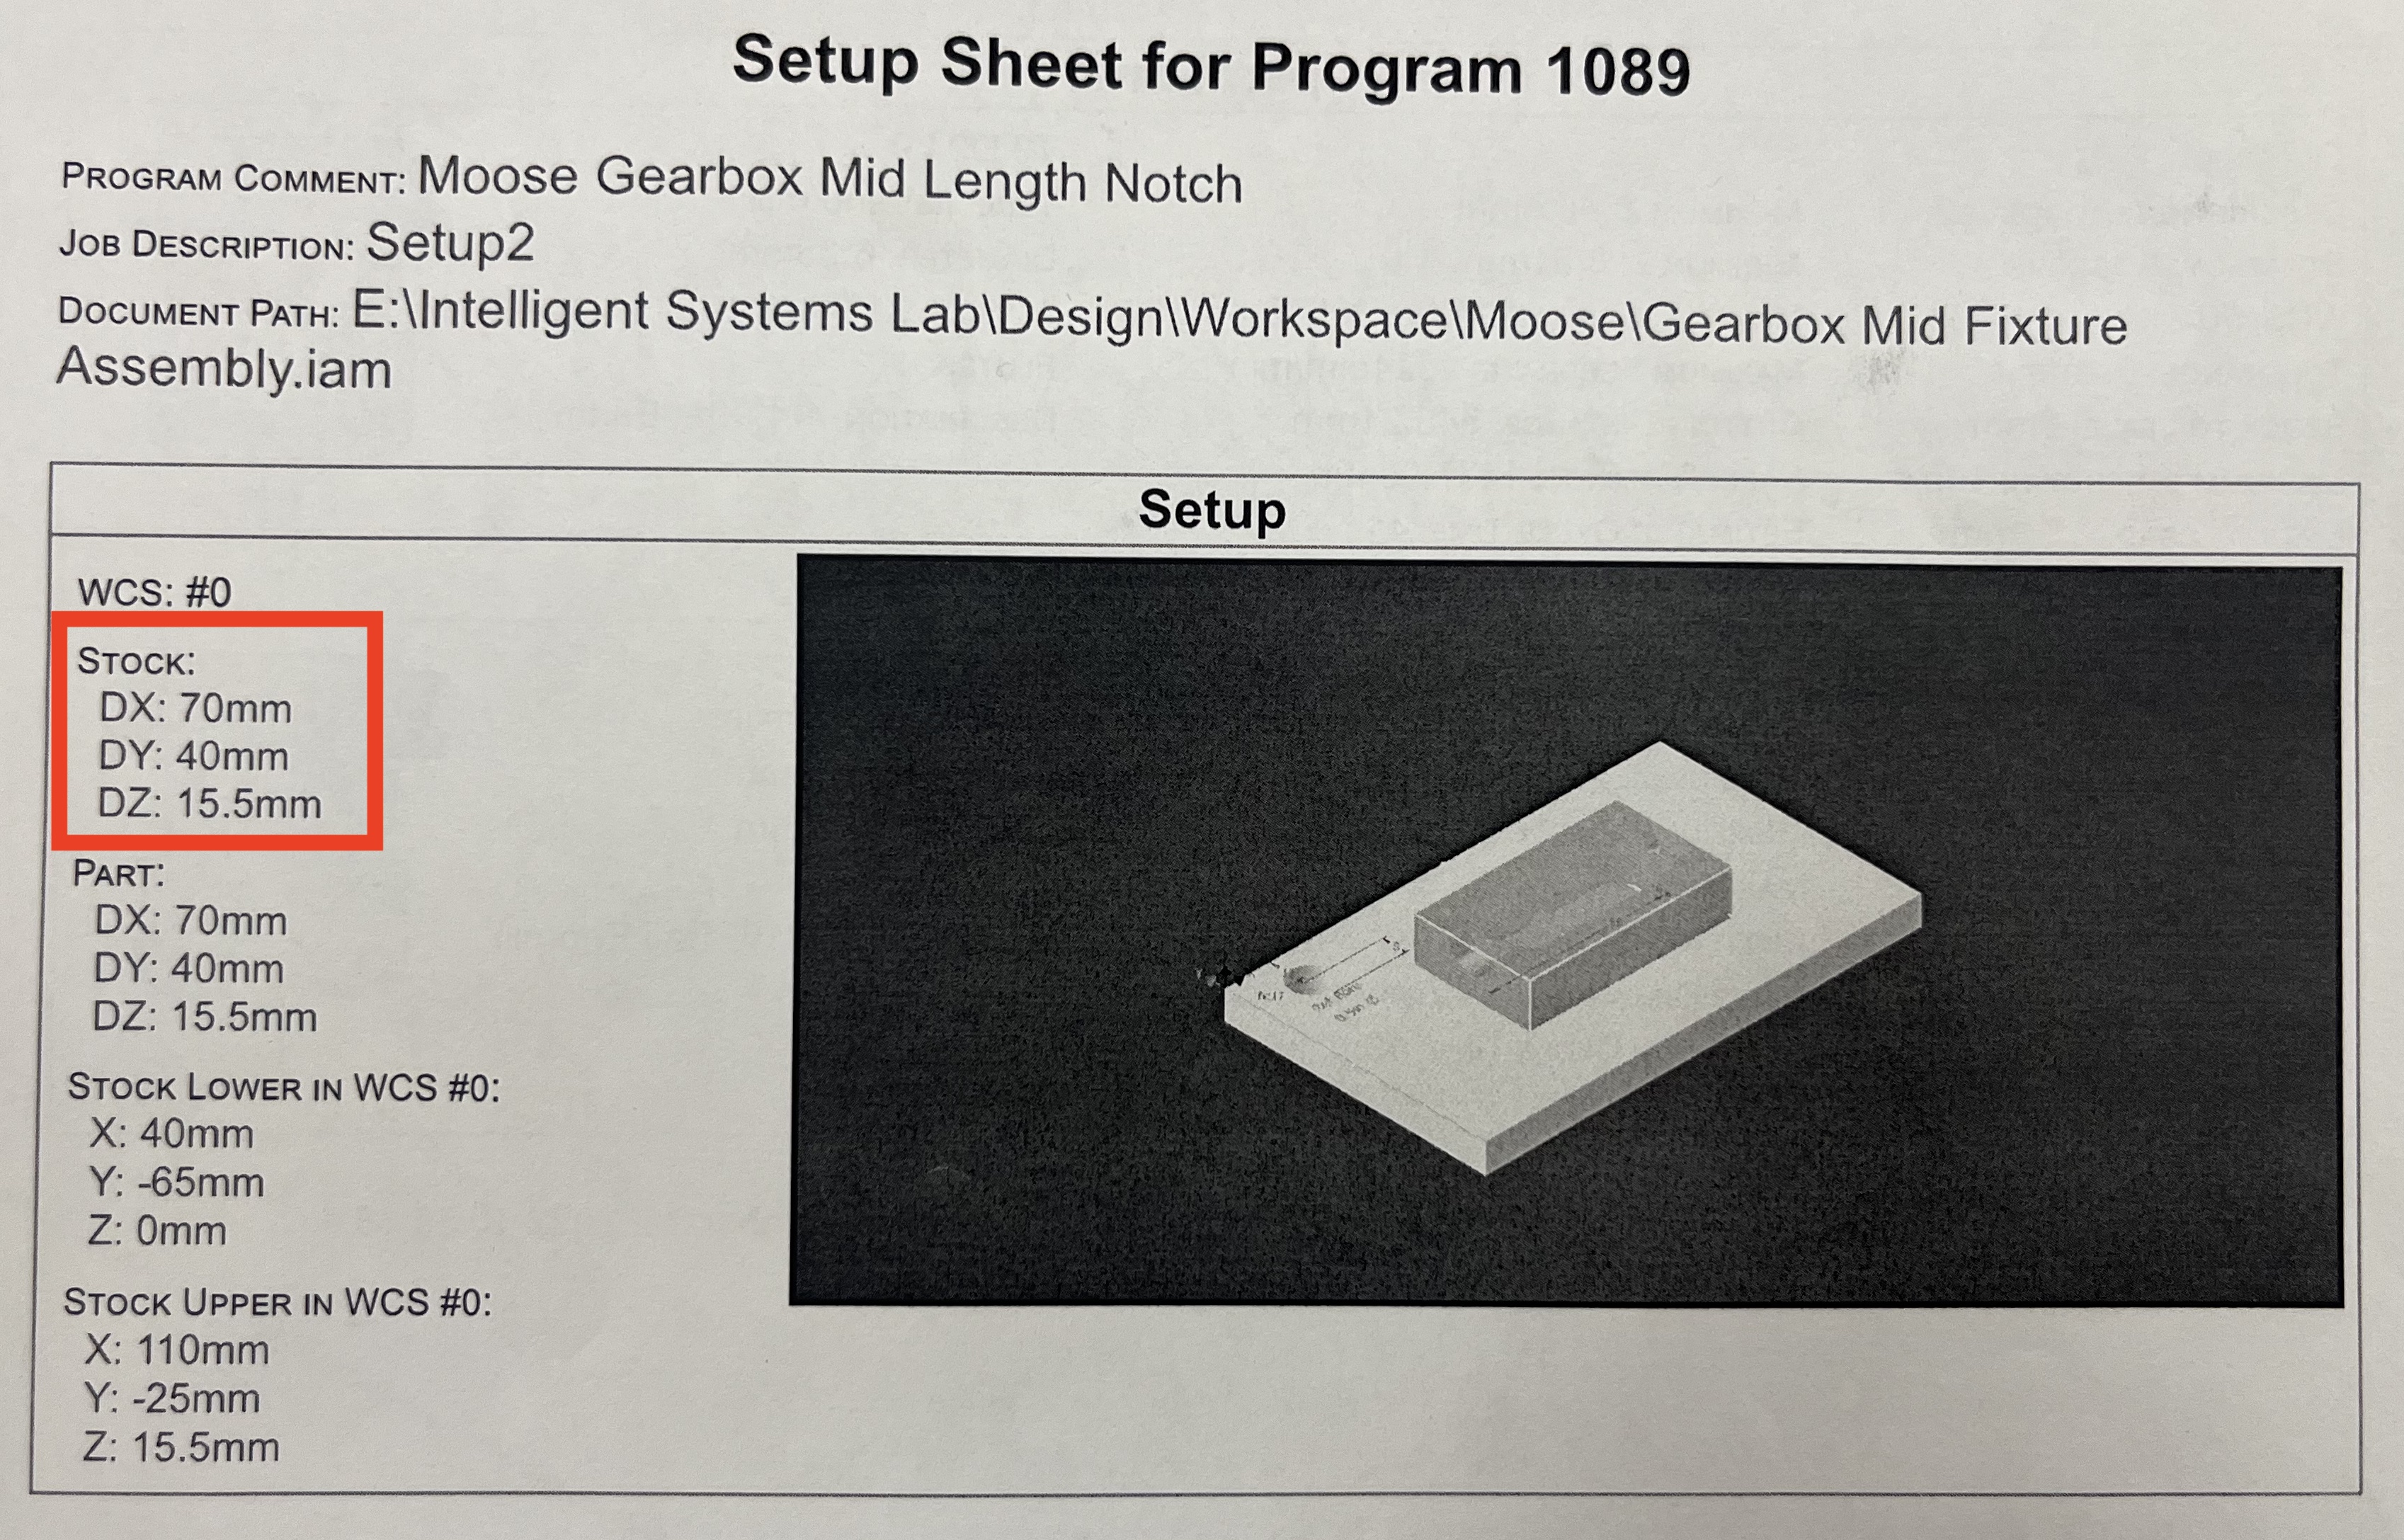
Once the work holding type is determined, you must prepare the stock. Using the setup sheet, under setup, look at the ‘stock’ measurements. These are the exact measurements of the stock piece you previously set in the CAM software.

Head to the stock room at the back of the machine shop with your setup sheet and caliper in hand.
Begin by measuring the thickness of the pieces. This corresponds to the z-measurement.
Once you find the correct thickness, take the piece to the workbench.
Using your caliper, measure the width and length of the stock and mark the distance. Make the stock a little larger because the chop saw doesn’t cut straight.
Head to the chop saw and cut the piece. Do not cut until the coolant begins to flow.
Once the stock has been cut, head to the belt sander and deburr all the edges.
IF you need to face the edges to straigten the piece: Using vertical mill, place the stock in the vise using the flattest edge, and use the face or end mill as needed. Deburr edges as needed. For more information on squaring stock, see https://youtu.be/XdEM77NDejE.
Fixing Stock on Vise
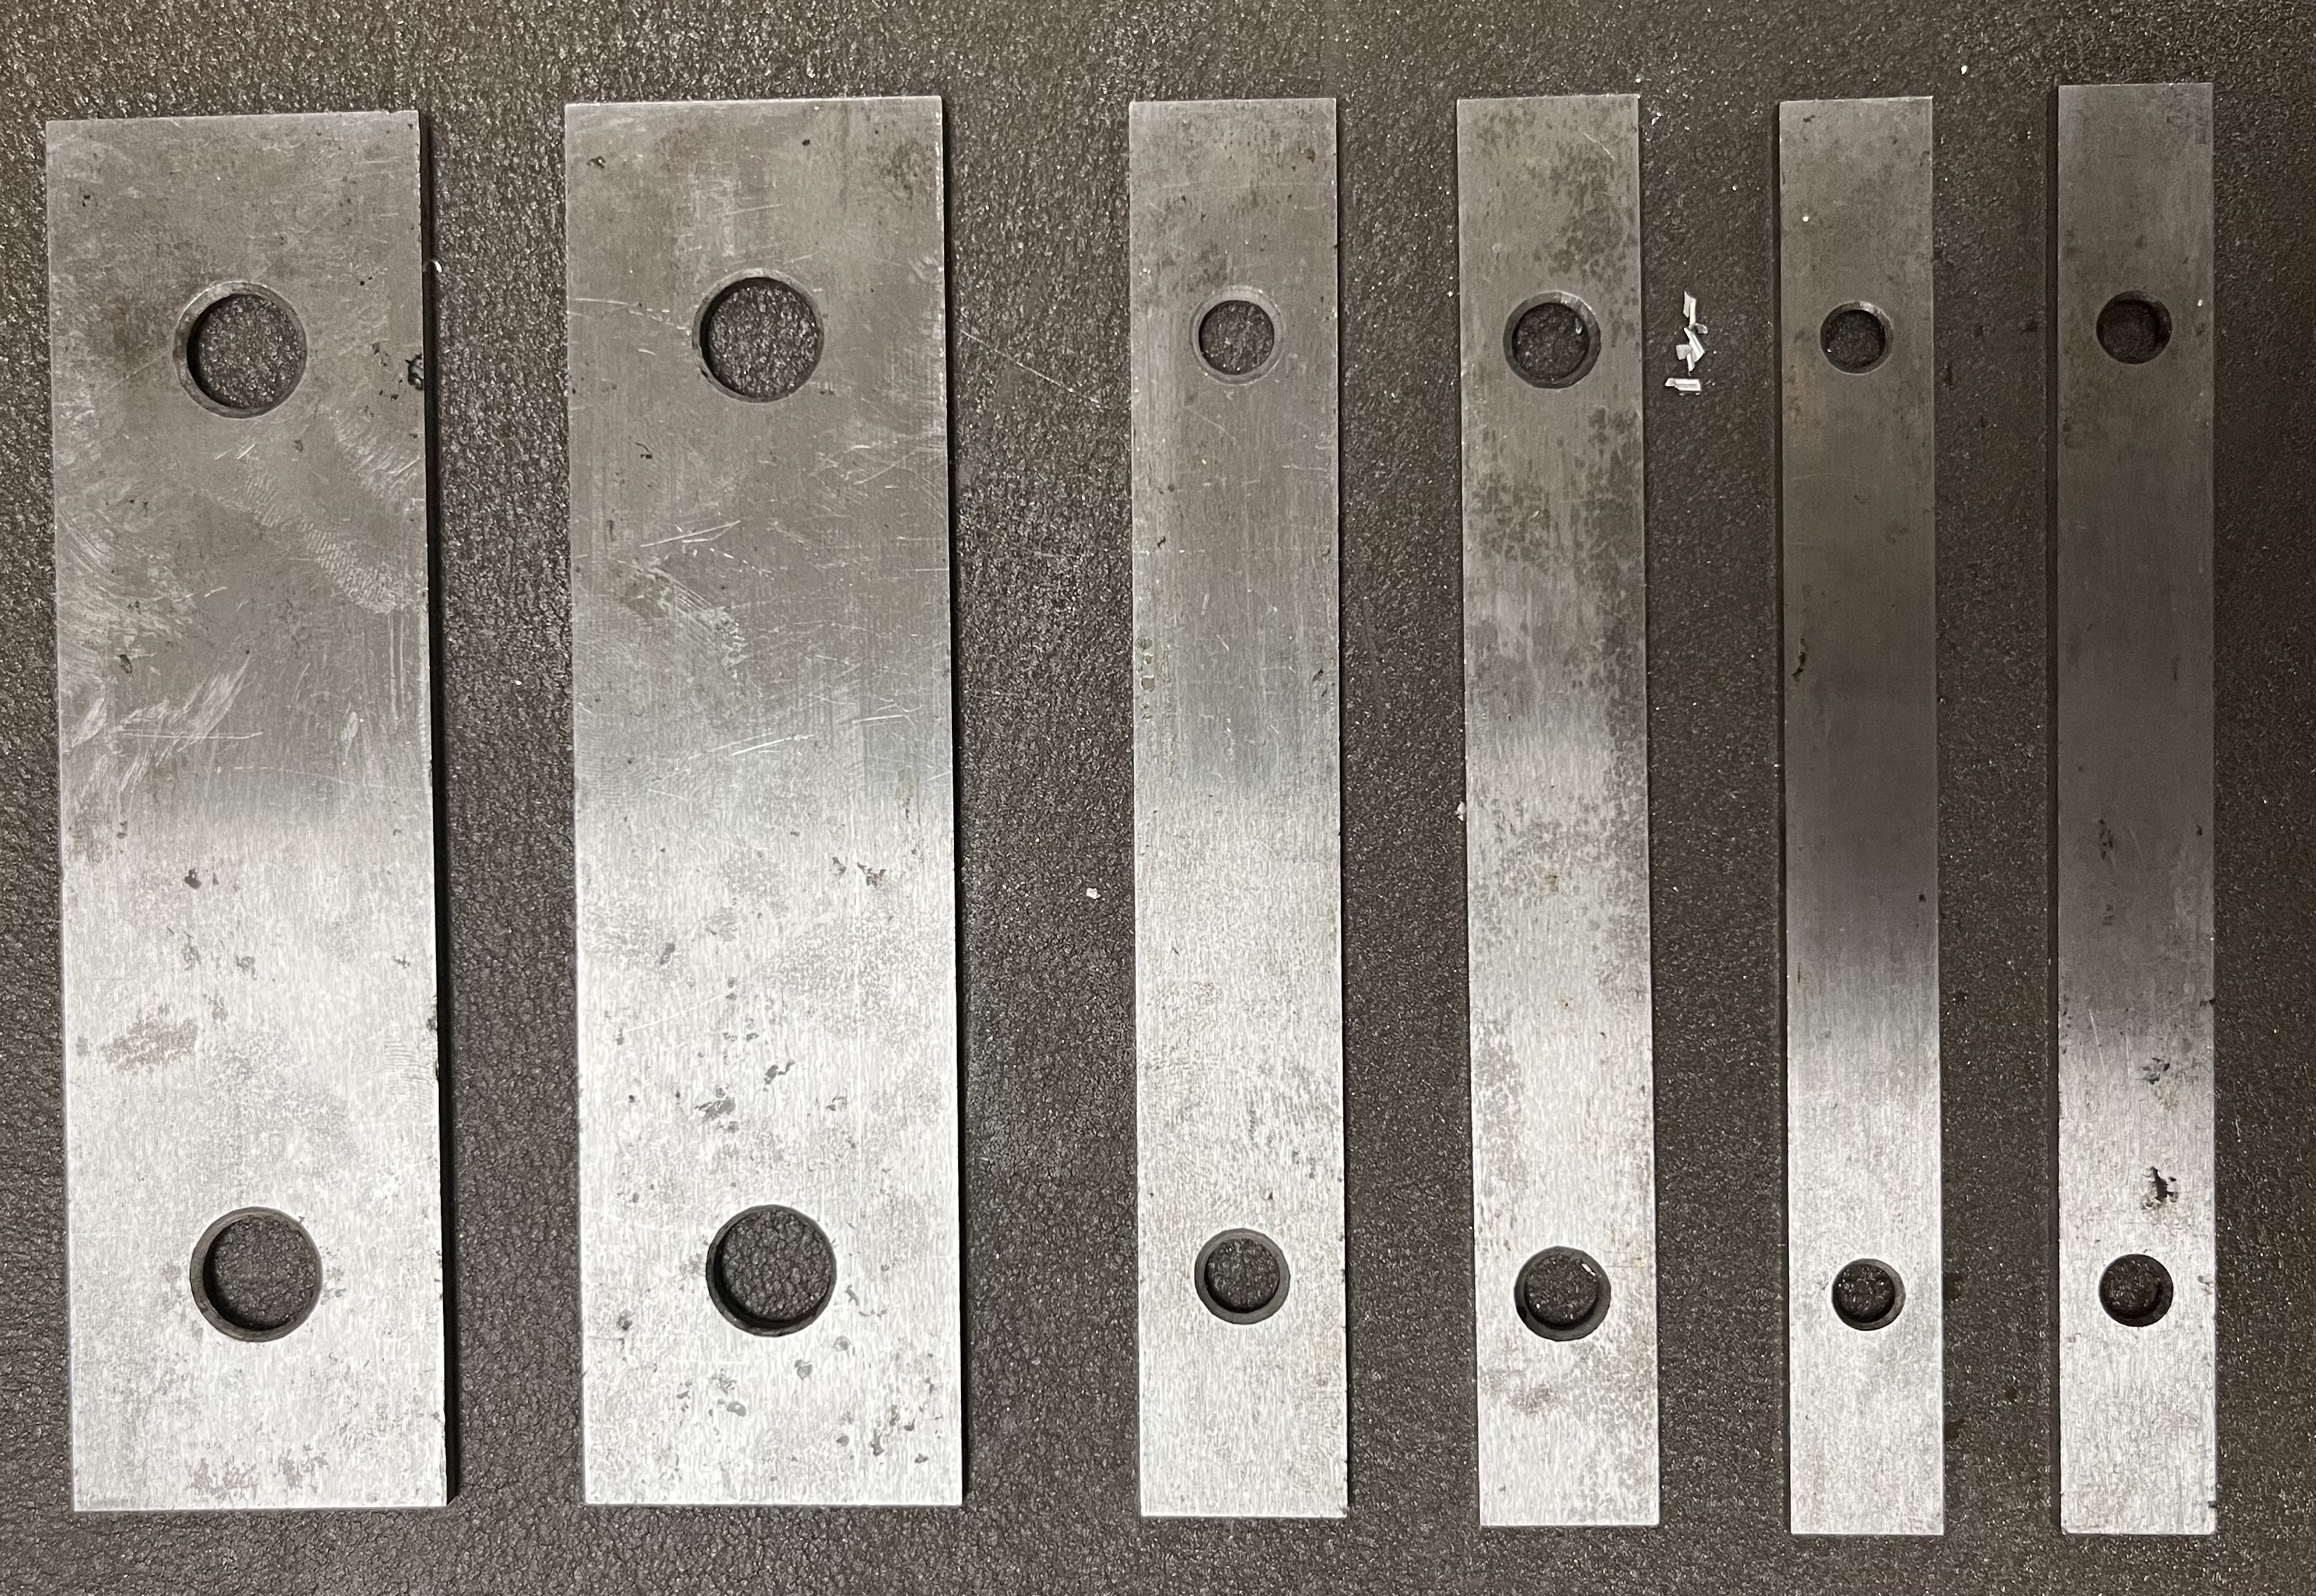
When your stock is ready to go, you can begin fixing it into the vise. To do this, begin by opening the CNC door and opening the vise. Depending on the position and height of the stock, you may need a set of parallels - this is to ensure you don’t machine the vise. These can be found in the metal case behind the machine. There are various sizes so make sure you choose a suitable size.

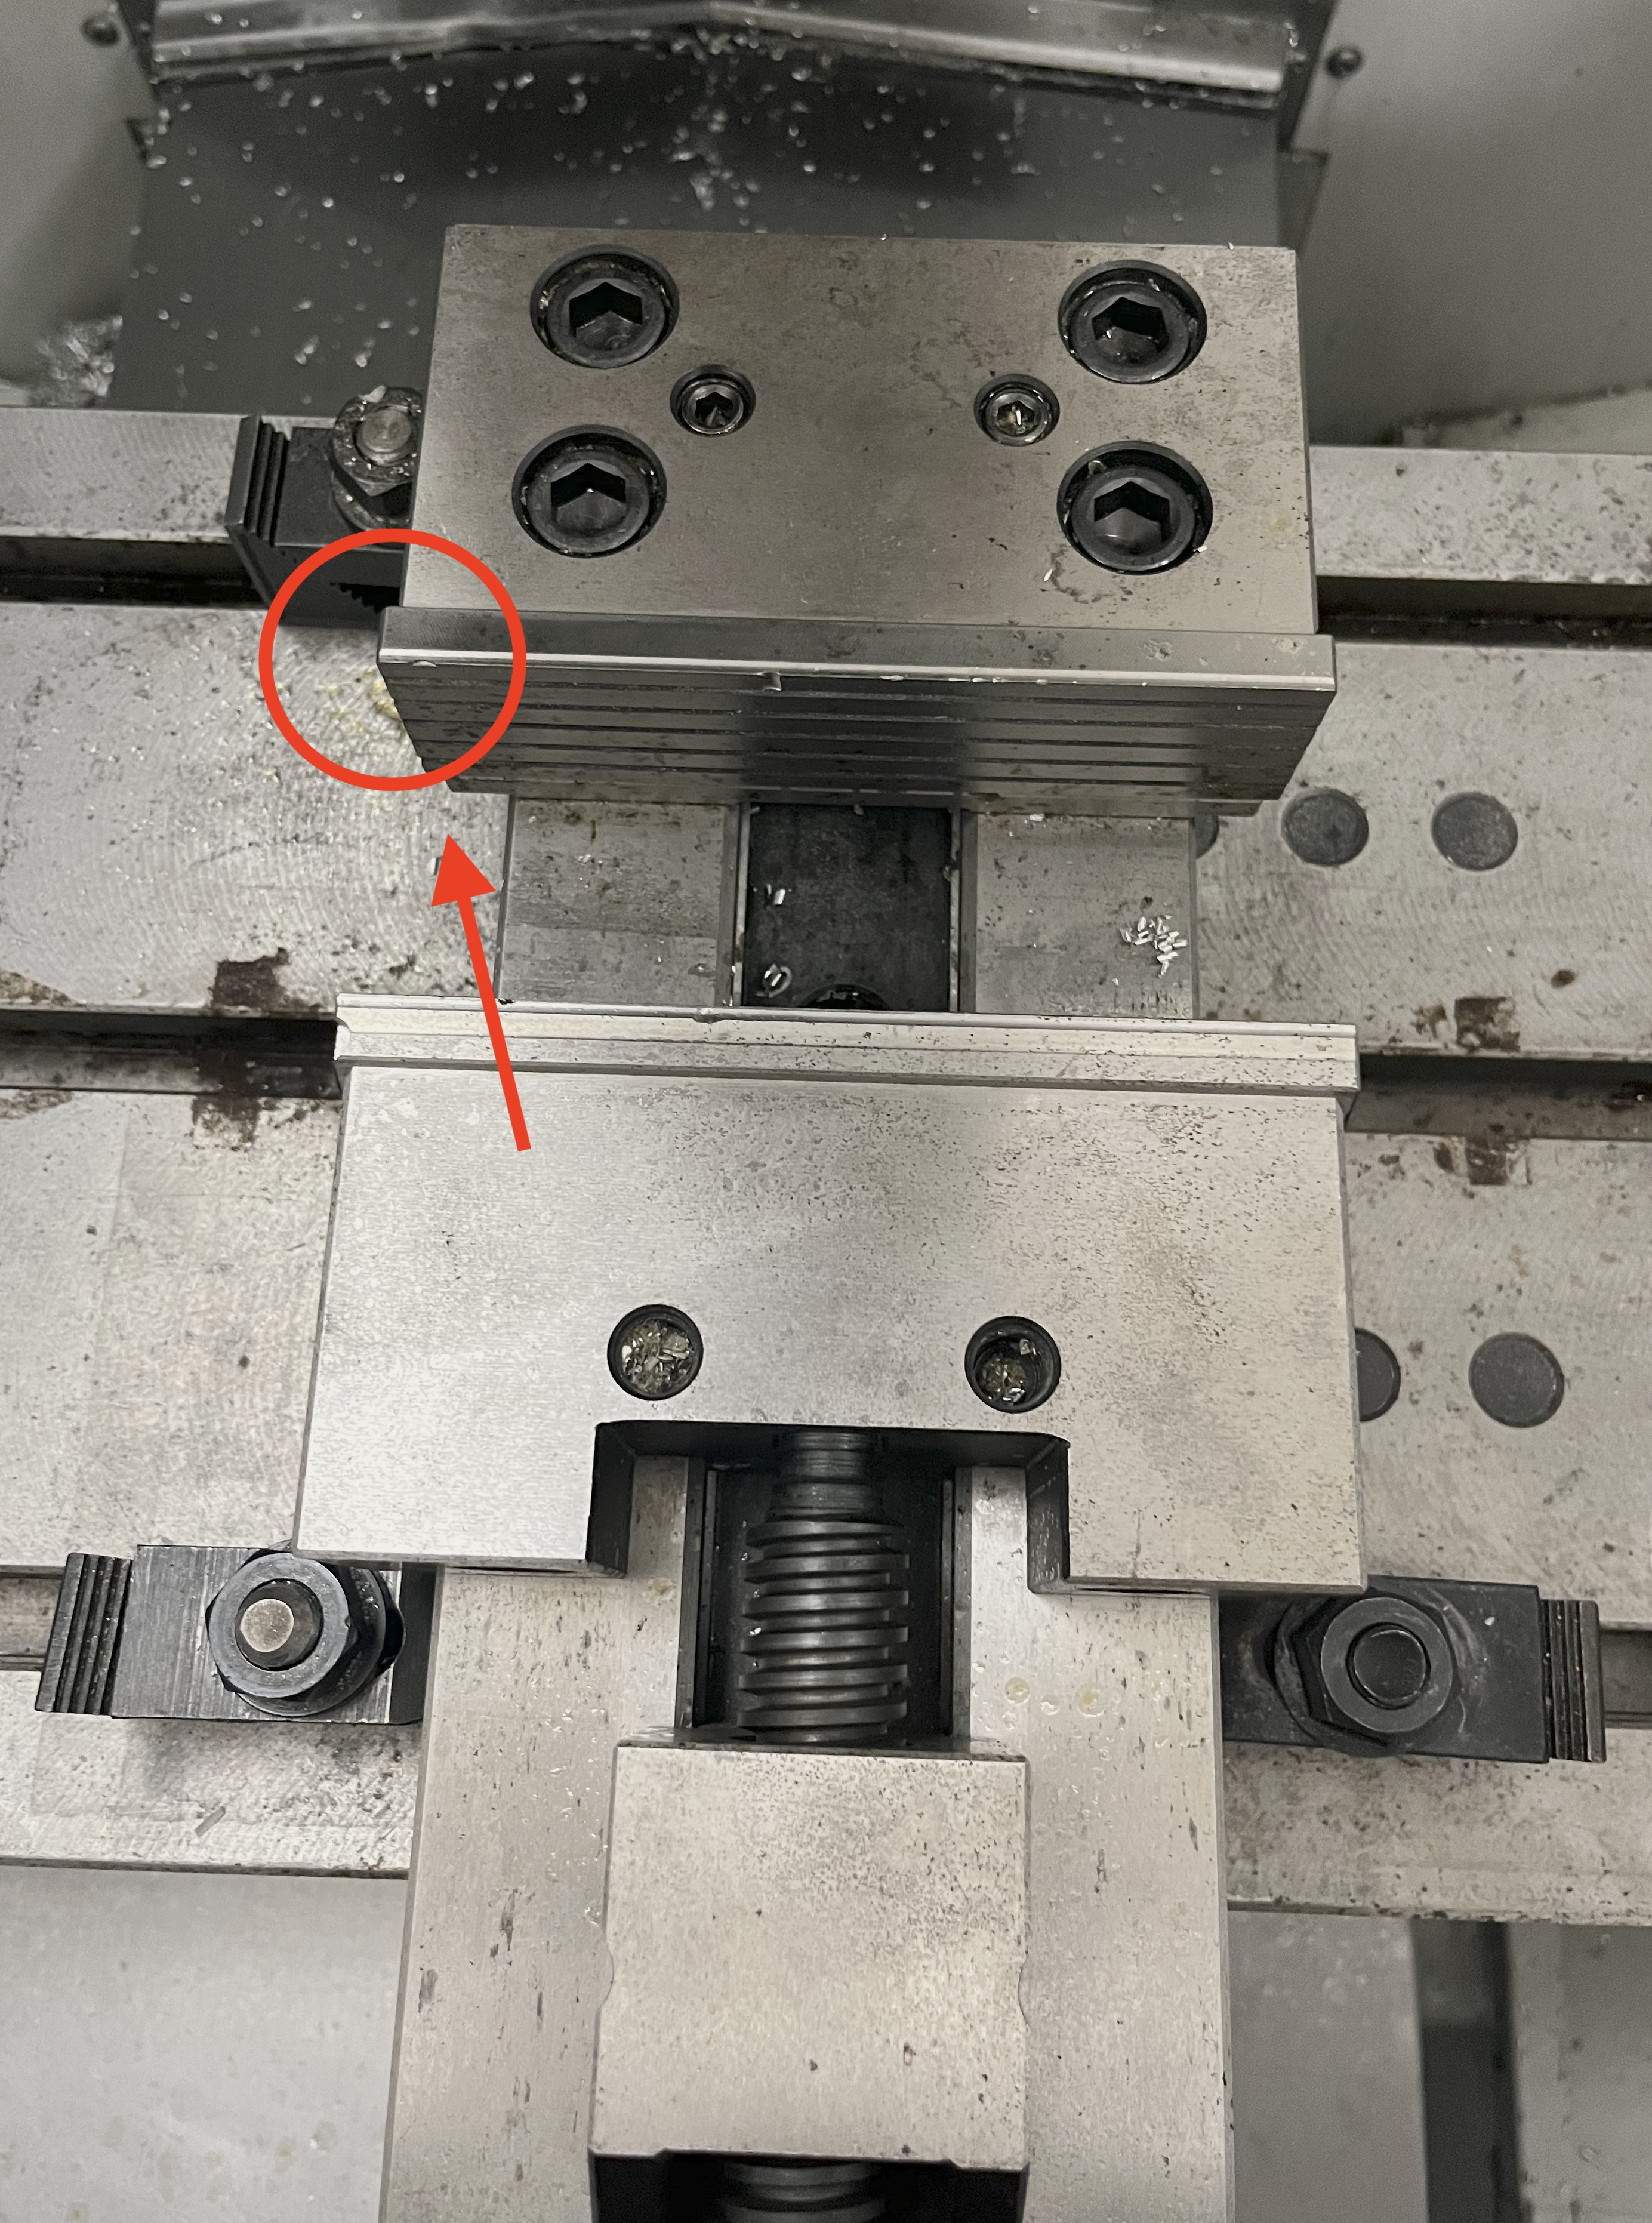
Place the top left corner of the stock in the top left corner of the vise. (This is if you plan on using the vise. For more information, see Work Offsets). Use parallels if necessary.

Begin tightening the vise. Ensure the parallels haven’t moved and that the stock is laying flat on them. To keep everything in place, hold the stock in place with one hand and use the other to tighten the vise.
When the stock is tightened, slide your finger along the parallels to make sure they don’t move.
If the parallels don’t move, continue to Tool Changes. If the parallels move, take the mallet from the top drawer of the toolbox and hit each corner of the stock then, try to move the parallels again.

If the parallels still move, tighten the vise again and repeat step 4. Repeat until the parallels do not move.
Now you have your stock secured in the vise.
NOTE: It is important that the stock is fixed to the top left corner as this is the machines’ set ‘zero’. If the stock is not positioned in this corner, the offset will be wrong and the part will be machined incorrectly. For more information on work offsets, please see Work Offsets.