Tool Offsets
In order for the machine to determine where the “top” of the stock is relative to the top of the tool, we must perform tool offsets for every tool we plan to use. This step is one of the most important steps in preparation to run the program and is done after we have changed all our tools to the ones we need. To begin tool offset:
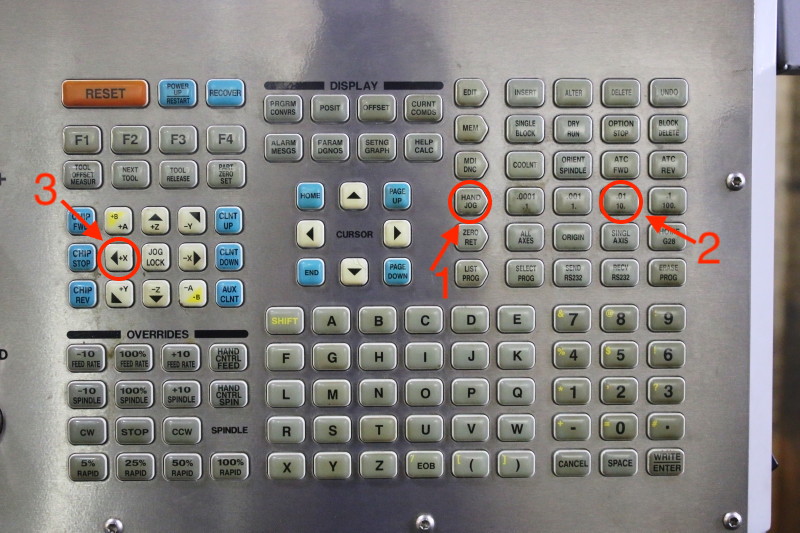
Bring the first tool on your setup sheet to the spindle by pressing MDI (Manual data input) > T1 (Tool 1) > ATC fwd (Automatic tool changer forwards), as shown below.
NOTE: The correct tools must be in place before doing the offset. To change any tools, see Tool Changes
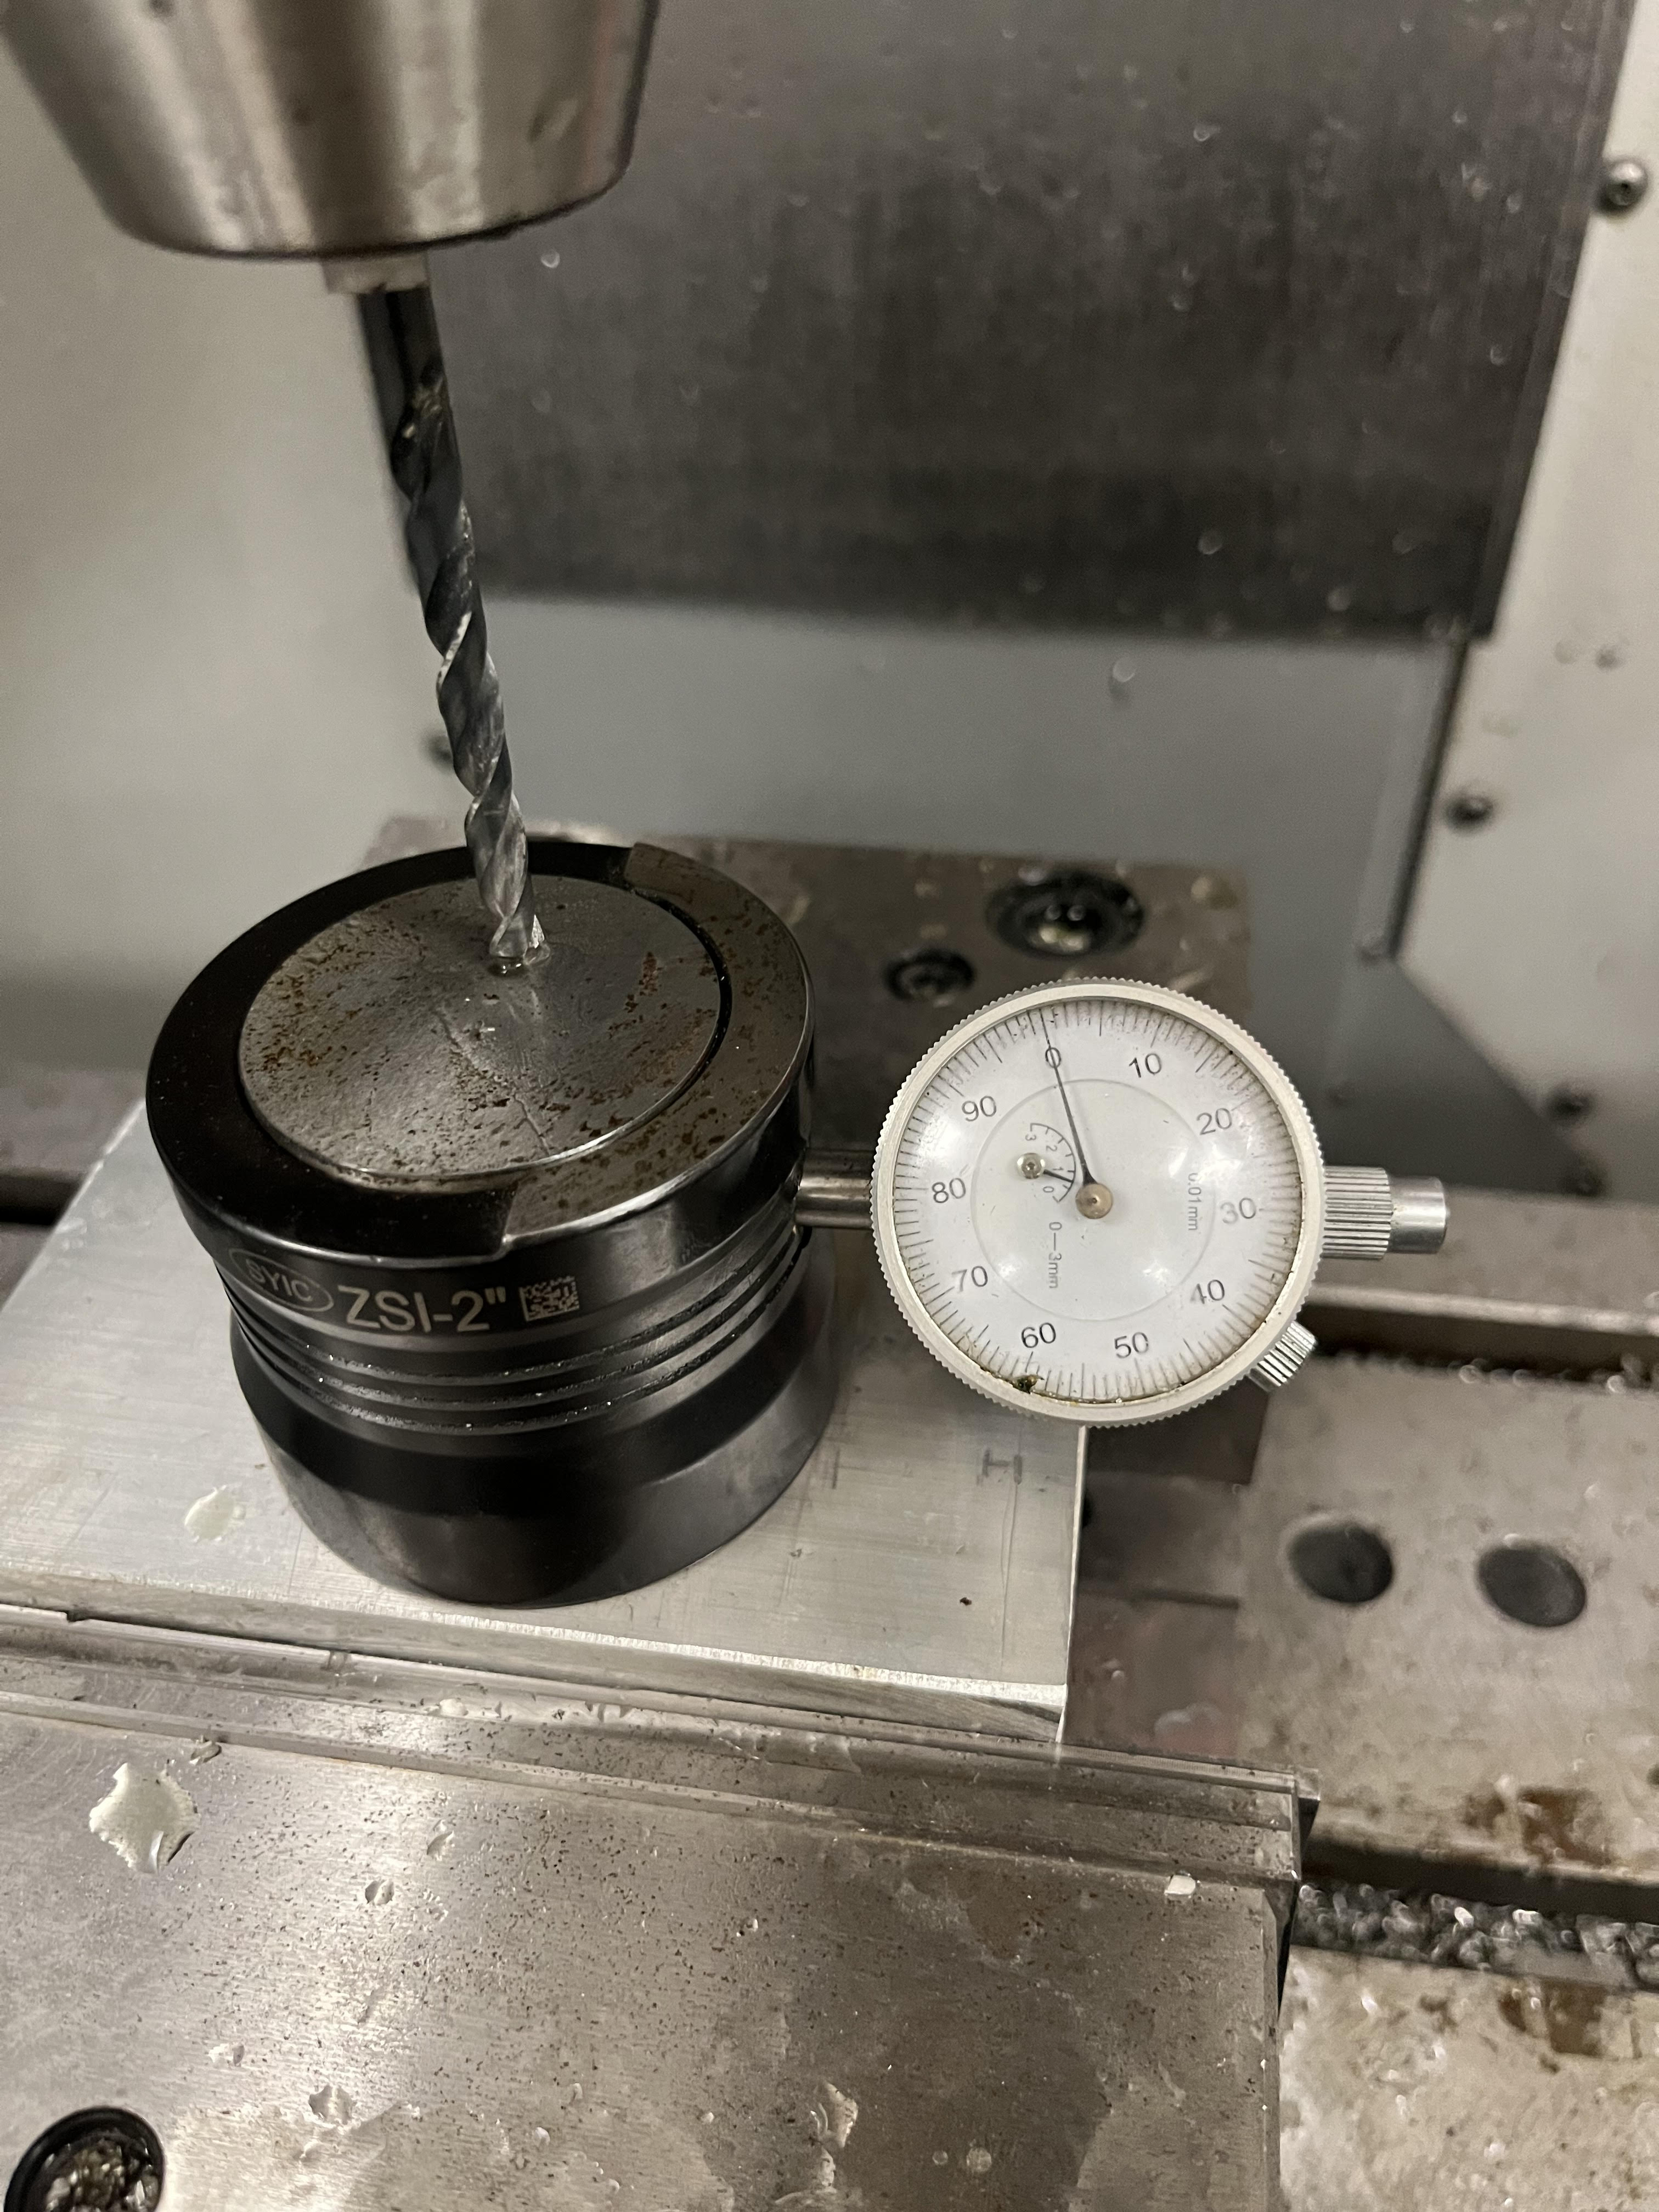
Place the offset gauge on your stock.
Using hand jog, line the x and y axis up with the offset gauge. To do this, press hand jog > .01 > Y or X axis and then, rotate the hand jog in the positive or negative direction until the tool is above the round center piece on the tool gauge.

Next, press hand jog > 0.01 > Z axis and SLOWLY begin to bring the tool down.
When you’re about an inch away from the top of the gauge, press 0.001 and again, slowly bring the tool down until it touches the top and the gauge begins to move.
Continue to slowly move the tool down until the gauge reads approximately 0.
Next, press 0.0001 and lean in close to the gauge. Move the gauge until it reads exactly 0.

Next, head to the control panel and make sure you can see the ‘Tool Offset’ screen. From there hit the right arrow in the cursor until you are under the ‘Geometry’ tab. Then, press tool offset measure and a value will show up under the tab you are on. This value is the current spindle z coordinate in the machine coordinate frame.
IMPORTANT: Press -50.8 (metric) and click enter. A new value should appear. This value is crucial as this is the distance from the gauge to stock top. It HAS to be entered every time. If machine is in imperial units, use -2.0 but if in metric units, use -50.8.
NOTE: Repeat step 8 and 9 twice to ensure the value is correct and no typos were made.
To begin lifting the tool off the gauge, press hand job > z axis > 0.001 and SLOWLY move the hand jog upwards. Make sure the z is moving away from the z-axis so the gauge doesn’t break.
Once the z-axis is moved far enough away, remove the gauge.
Repeat steps 1 through 11 until ALL tools have been correctly offsetted.
DO NOT mess up the -50.8 value. This value is the offset of the gauge so if you skip this, the tool offset relative to to the stock will not be correct and will cause the tool to crash into the stock/table.